
35 KiB
35 KiB
The Odin Project
How to ask good programming questions
- Be very specific and patient
- use screenshots when available
- ask questions directly instead of asking to ask ie. "are there any java experts around?"
Git
Set up Git
- Set username and email
git config --global user.name "username"
git config --global user.email "email"
- If using GitHub, change branch from 'master' to 'main'
git config --global init.defaultBranch main
- Enable colorful output with git
git config --global color.ui auto
- Set default branch reconciliation behavior to merging
git config --global pull.rebase false
- Verify the config
git config --get user.name
git config --get user.email
Create an SSH Key for repos
- SSH keys are good for avoiding retyping credentials every time
- Check to see if there is an existing ssh key
ls ~/.ssh/id_ed25519.pub
- if nothing appears, then there is no key and one needs to be made
- Create ssh key
ssh-keygen -t ed25519 -C <youremail>
- press enter when asked for what location to store it unless you have a specific location
- add a passphrase and retype it
Link SSH key to Git
- Find the ssh key input on GitHub or repository website of your choice
- Click on new ssh key and give it a name and leave the window open for the next steps
- Copy the public SSH key
cat ~/.ssh/id_ed25519.pub
- Paste the key into your settings, it should start with
ssh-ed25519and end with your email
Change git repository remote
git remote set-url origin https://'username':'password'@repositorylink
Using Git
- Check git version by using
git --version - After creating a new repository you can clone it to your current directory by using
git clone <repolink> - After the cloning, check the url with
git remote -v - Use
git statusto check the status of the current files within your directory - To commit to the repo you can use
git commit -m "Add helloworld.txt" - Confirm with
git status - You can use
git logto view the most recent commits - After creating a file you can use
git add <filename>to add that specific file orgit add .to add all files within the directory that are not on the repo - We can push the changes to the cloud repository with
git push origin main, origin being the remote location and main being the branch to upload to- Make sure to only push working code
Git Best Practices
- Atomic commits
- A commit that includes changes related to only one feature or task of your program.
- Easily reversible if the commit causes breaking changes
- Enables you to write more specific commit messages
- A commit that includes changes related to only one feature or task of your program.
Changing the Git Commit Message Editor
- Typing
git config --global core.editor "code --wait"into the terminal will give you the option to use eithergit commit -m <your message here>orgit commitwithout anything extra.
When to Commit
- These are best made when you think is a good time to take a snapshot of your current project
- Never commit code that isn't working to the main branch if it was working before
- It is considered best practice to commit every time you have a meaningful change in the code
- Creates a trail to show how you got to the current iteration of the code
- Useful for when looking back to when the project feature was working to compare what you've changed
HTML And CSS Introduction
- What is HTML?
- Stands for Hypertext Markup Language
- It's the raw data that a webpage is built out of. Includes:
- text
- links
- cards
- lists
- buttons
- What is CSS?
- Stands for Cascading Style Sheets
- It's the styling of the HTML page
- Controls colors
- Controls Positioning of text and font
- HTML and CSS are not programming languages, technically speaking because they only present information and are not used to compute any logic
- JavaScript would be a programming language that leverages both HTML and CSS
Elements and Tags
- HTML defines the structure and content of webpages.
- HTML elements are used to create:
- paragraphs
- headings
- lists
- images
- links
- Elements are simply pieces of content wrapped in opening and closing tags
- Another way to define them is containers for content
- Paragraph is
<p> </p> - Some tags do not require a closing tag
- line break is
<br>or<br /> - image insert would be
<img />or<img>
- There many tags, looking at documentation for most of them is standard HTML Elements
- Intro to HTML Video 3:42
HTML Boilerplate
- All HTML docs have the same basic structure that needs to be in place before anything useful can be done.
The DOCTYPE
- Every HTML page starts with a doctype declaration
- The purpose of it is to tell the browser what version of HTML it should use to render the document(current being HTML5)
- HTML5 Doctype is
<!DOCTYPE html>
- HTML5 Doctype is
- The doctypes for older version of HTML were more complicated
- Example of doctype for HTML4
<!DOCTYPE HTML PUBLIC "-//W3C//DTD HTML 4.01 Transitional//EN" "http://www.w3.org/TR/html4/loose.dtd">
HTML Element
- Now we need to provide an
<html>element. More commonly known as the root element of the document- root means that every other element in the document will be a descendant of that one
- The
langattribute specifies the language of the text content in that element- primarily used for improving accessibility of the webpage
enis used for English
- The
<head>element is where important meta-information about our webpages and items required for our webpages to render correctly in the browser- inside of the
<head>element, there should not be any element that displays content on the webpage
- inside of the
The Charset Meta Element
- The meta tag for the charset encoding of the webpage in the head element:
<meta charset="utf-8"> - The encoding ensures that the webpage will display special symbols and characters from different languages correctly in the browser
Title Element
- Should go in the head of an HTML doc
<title>My First Webpage</title> - It's used to give webpages a human-readable title which is displayed in our webpages' browser tab
- The default title for a webpage is it's filename, in this case
index.html- This is a security risk as you wouldn't want the internet to know what any of your files are named or how they are placed within the project directory
- Also would make it difficult for the end user to remember what tab it is if they have multiple open
<!DOCTYPE>
<html lang="en">
    <head>
        <meta charset="UTF-8">
        <title>My First Webpage</title>
    </head>
</html>
Body Element
- All content will be displayed to users inside of this tag
<!DOCTYPE>
<html lang="en">
    <head>
        <meta charset="UTF-8">
        <title>My First Webpage</title>
    </head>

    <body>
    </body>
</html>
Viewing HTML Files in the Browser
- You can drag and drop an HTML file into the browser and it will open up the page
- You can also use a preview extension that will open a browser window
- In Ubuntu you can use the command
google-chrome index.htmlto open it as well - Using
<h1>for the heading can render out a title on the page
<!DOCTYPE>
<html lang="en">
    <head>
        <meta charset="UTF-8">
        <title>My First Webpage</title>
    </head>

    <body>
        <h1>Hello World!</h1>
    </body>
</html>
- VSCode can generate the entire boilerplate by entering
!into a blank.htmldocument
Working With Text
Paragraphs
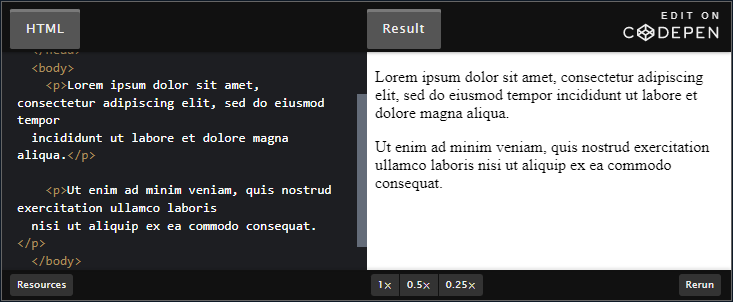
- If text is not preceded by a
<p>, then it will all clump together as one large body of text 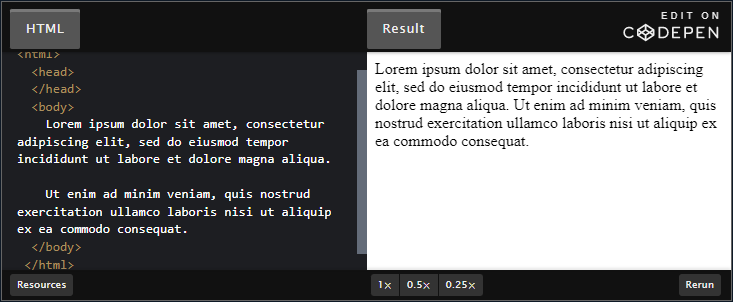
Headings
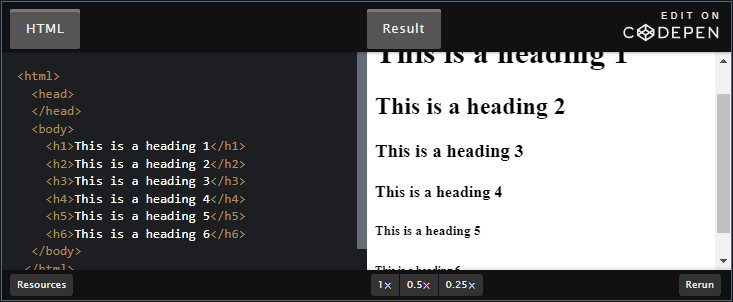
- These use the
<hx>tag wherexis the number that changes the font<h6>is the smallest font
Strong Element
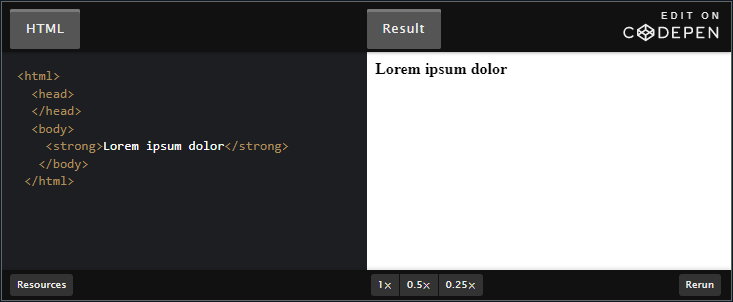
- The
<strong>tag makes text bold - It also marks text as important semantically
- This affects tools like screen readers for visual impairments
- It will change the tone of the voice for the content within the
<strong>tag
<strong>Showing bolded wording</strong>
Em Element
- The
<em>tag makes text italic and also emphasises in text to speech 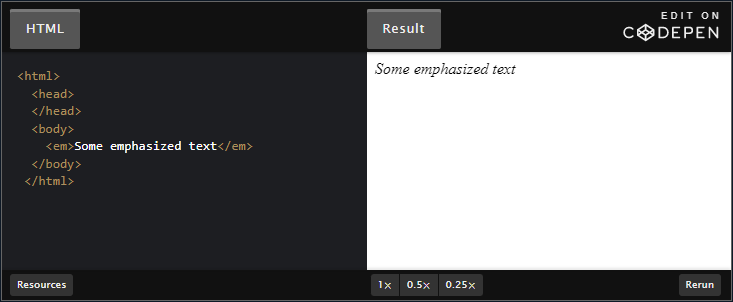
Nesting and Indentation
- Elements are nested for legibility
- Also known as parent/child/sibling elements
- Similar to braces for code
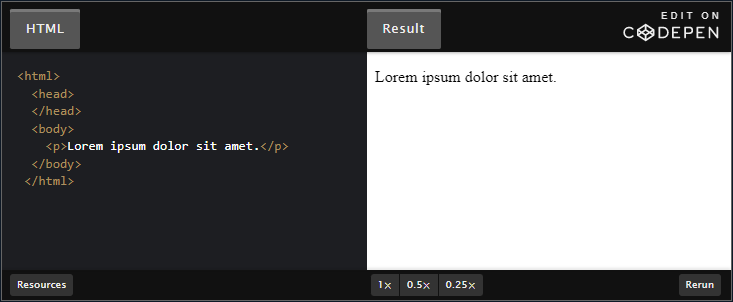
<html>
  <head>
  </head>
  <body>
    <p>Lorem ipsum dolor sit amet.</p>
  </body>
 </html>
HTML Comments
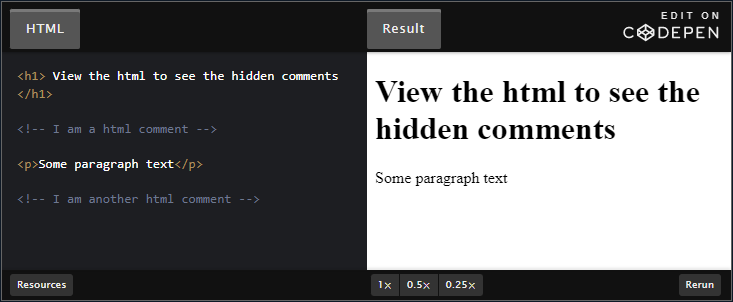
- Comments are not visible when the page is rendered
- Useful for reading page format when performing maintenance
- Comments are written with
<!-- -->, where the comment is inside the whitespace
<h1> View the html to see the hidden comments </h1>

<!-- I am a html comment -->

<p>Some paragraph text</p>

<!-- I am another html comment -->
Lists
- Lists are one of the most commonly usedd elements/data structures because they neatly organize many items
Unordered Lists
- The order is random or irrelevant, then using an unordered list is the right choice
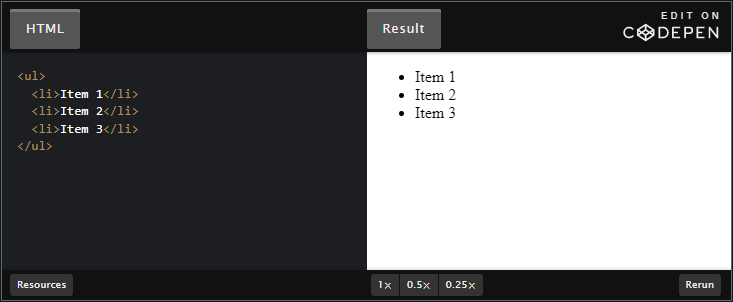
- It's created by using the
<ul>tag, with each element inside of the list using the<li>tag
<ul>
  <li>Item 1</li>
  <li>Item 2</li>
  <li>Item 3</li>
</ul>
Ordered Lists
- Useful when the order of the list matters
- It's created by using the
<ol>tag instead with the same<li>elements inside of it
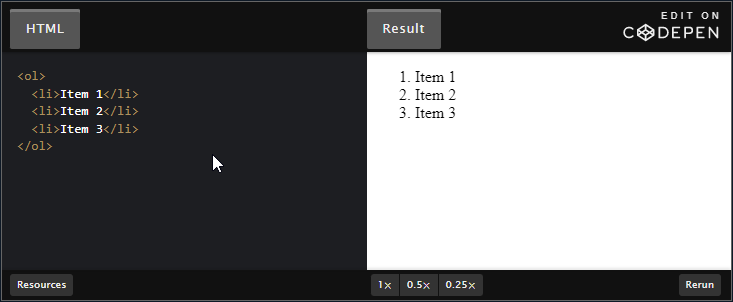
<ol>
  <li>Item 1</li>
  <li>Item 2</li>
  <li>Item 3</li>
</ol>
Links and Images
- Links allow for the chaining of other HTML pages on the web
- Create an
index.htmlfile and use it so link other pages within the odin-links-and-images directory
Anchor Elements
- The anchor element is denoted by the
<a>tag- It creates a link with a separate page and routes towards it
- Requires an HTML attribute in order to complete the link
- This link is known as a reference,
<a href="https://www.theodinproject.com/about">click me</a>- the
hrefattribute is what highlights text in blue to show that it is linked to an address - Links work for anything that has a web address, this includes:
- photos
- documents
- pdfs
- html pages
- videos
- the
Absolute and Relative Links
- Most links are one of two things:
- Links to pages on other websites
- Links to pages on our own website
- Absolute Links
- Links to pages on other websites, in order to link you need the full address of the destination
- Example:
protocol://domain/path,www.https://youtube.com/home
- Example:
- Links to pages on other websites, in order to link you need the full address of the destination
- Relative Links
- Links to other pages within our own website, or internal links
- These links do not include the domain name since it is within the same domain
- Relative links consist of the file path instead of the web address
- Links are created the same whether absolute or relative, the
hreftag is what controls the anchor binding - Proper file management recommends to have a separate directory for
pageswithin the project - The proper way to direct an anchor to a subdirectory is by using
./in the path- This tells the anchor to start looking for the file/directory relative to the
currentdirectory of where theindex.htmlis located
- This tells the anchor to start looking for the file/directory relative to the
A Metaphor
- The domain name
town.comis a city - The directory where the website is located would be similar to a museum
/museum- Each page on your website could be considered a room, in this case a room within the museum
/museum/movie_room.htmlor/museum/coffee_shop.html - Relative links like
./shop/coffee_shop.htmlare directions from the current room (movie_room) - Absolute link would be the full directions to the room from entering the town
- Ex:
https://town.com/museum/shops/coffee_shop.html
- Ex:
- Each page on your website could be considered a room, in this case a room within the museum
Images
- HTML uses the
<img>tag in order to embedd images into the page, does not require a closing tag- These images can be added with Absolute or relative links Ex:
<img src="https://www.theodinproject.com/mstile-310x310.png"> 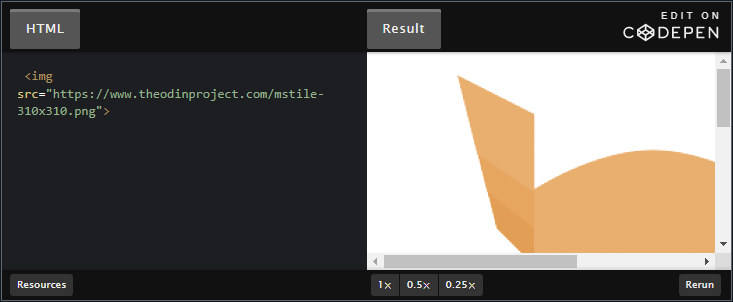
- These images can be added with Absolute or relative links Ex:
Parent Directories
- In order to navigate to the parent directory when linking, you should use
../relative to the current directory
Alt attribute
- images also have an alt attribute
- Used to describe the image, helps with accessability and when the image itself can't be loaded
- Ex:
<img src="https://www.theodinproject.com/mstile-310x310.png" alt="The Odin Project Logo">- This loads the logo, if it can't then
The Odin Project Logois displayed
- This loads the logo, if it can't then
Div
- A
<div>is a basic HTMl element that intiates an empty container - Commonly used to pair with css styling for certain portions of the page
Recipes
- Project to build a basic recipe website
- Will have a main index page with links to a few recipes
Assignment
- Iteration 1: Initial Structure
- Within the
odin-recipesdirectory, create anindex.htmlfile - Fill it out with the usual boilerplate HTML and add an
h1heading "Odin Recipes" to the body
- Within the
- Iteration 2: Recipe Page
- Create a new directory within the
odin-recipesdirectory and name itrecipes - Create a new HTML file within the
recipesdirectory and name it after the recipe it will contain.- Ie.
lasagna.html - Include an
h1heading with the recipe's name as its content
- Ie.
- Back in the
index.htmlfile, add a link to the recipe page you just created- Use an anchor
- Create a new directory within the
- Iteration 3: Recipe Page Content
- An Image of the finished dish under the
h1heading - Under the image, it should have an appropriately sized "Description" heading followed by a paragraph or two describing the recipe
- Under the description, add an "Ingredients" heading followed by an unordered list of the ingredients needed for the recipe.
- Finally, under the ingredients list, add a "Steps" heading followed by an ordered list of the steps needed for making the dish
- An Image of the finished dish under the
- Iteration 4: Add More Recipes
- Add two more recipes with the identical page structures to the recipe page you've already created
- Don't forget to link to the new recipes on the index page
- Consider putting all the links in an unordered list so they aren't all on one line.
CSS Foundations
Basic Syntax
- Uses semicolons to signify the end of a declaration
- Uses the
property:valuepair format
Selectors
- These are the HTML elements to which CSS rules apply
Universal Selector
- This selects elements of any type and the syntax for it is an asterisk
- Ex: every element should be in purple
  * {
    color: purple;
  }
Type Selectors
- A type selector is also referred to as an element selector
- Selects all elements of the given element type
<!-- index.html -->

<div>Hello, World!</div>
<div>Hello, again!</div>
<p>Hi...</p>
<div>Okay, bye.</div>
/* styles.css*/

div {
  color: white;
}
- All three
<div>elements would be selected, while the<p>would be left alone
Class Selectors
- These will select all elements within a given class
- A class is initialized within a
<div>tag
<!-- index.html -->

<div class="alert-text">
  Please agree to our terms of service.
</div>
/* styles.css*/

.alert-text{
  color: red;
}
- The syntax for class selectors uses a period before the case-sensitive value of the class attribute
- Classes can be used multiple times if you want to have them in different areas of the webpage, but with the same styling
- multiple classes can be initialized with a space instead of a comma
- Ex:
class="alert-text severe-alert"initializes both thealert-textand thesevere-alertclass
- Ex:
ID Selectors
- Similar to class selectors, select an element with the given ID instead of the class
<!-- index.html -->

<div id="title">My Awesome 90's Page</div>
/* styles.css*/

#title{
  background-color: red;
}
- instead of a period, they use the hastag immediately followed the case-sensitive value of the ID attribute
- ID's should be used sparingly and good use cases for them are:
- changing something specific within a page
- links that redirect to a section on the current page
- Major difference between classes and IDs is that an element can only have one ID
- The ID cannot be repeated on a single page, so they are unique per html page
- The ID should not contain any whitespace at all
Grouping Selector
- If two groups share some of their stylings, then you can cut down on the amount of repetittion
.read {
  color: white;
  background-color: black;
  /* several unique declarations */
}

.unread {
  color: white;
  background-color: black;
  /* several unique declarations */
}
- Both
.readand.unreadselectors share thecolor: white;andbackground-color: black;declarations, we can group them with a comma to have only the unique declarations be separate
.read,
.unread {
  color: white;
  background-color: black;
}

.read {
  /* several unique declarations */
}

.unread {
  /* several unique declarations */
}
- The advantage to grouping would be that if we want to ever change the
colororbackground-color, then we can quickly change them within the single selector for the entire page
Chaining Selectors
- Another way to use selectors is to chain them as a list without any separation
- Ex: HTML
<div>and<p>with thesubsectionclass
<div>
  <div class="subsection header">Latest Posts</div>
  <p class="subsection preview">This is where a preview for a post might go.</p>
</div>
- In order to only change the class with both
subsectionandheader, then we chain the selectors
.subsection.header{
  color:red;
}
subsection.headerselects any element that has both thesubsectionandheaderclasses.- Works for all combinations of selectors except for Type Selectors
- Can also be used to chain a class and an ID
<div>
  <div class="subsection header">Latest Posts</div>
  <p class="subsection" id="preview">This is where a preview for a post might go.</p>
</div>
.subsection.header {
  color: red;
}

.subsection#preview {
  color: blue;
}
- Notice how a class is chained to an ID by using their respective syntax of
.class#ID-
Note: Does not work for chaining more than one type of selector
- It is also dependent on the type of element
- Ex:
<div>can't be chained to<p>because it would create<divp>and it doesn't exist as an element
-
Descendant Combinator
- Allows for combining multiple selectors differently than either grouping or chaining them
- Shows the relationship between the selectors
- Four types of combinators
- The descendant combinator is represented in CSS by a single space between selectors
- Will only cause elements that match the last selector to be selected if they also have an ancestor(parent, grandparent, etc) that matches the previous selector
- Ex:
.ancestor .childwould select an element with the classchildif it has an ancestor with the classancestor, no matter how deep
<!-- index.html -->

<div class="ancestor"> <!-- A -->
  <div class="contents"> <!-- B -->
    <div class="contents"> <!-- C -->
    </div>
  </div>
</div>

<div class="contents"></div> <!-- D -->
/* styles.css */

.ancestor .contents {
  /* some declarations */
}
- In this example only B and C will be selected because they are part of the
ancestorclass- D is off on its own without the
ancestorparent
- D is off on its own without the
- There is no limit to the amount of combinators that could be used
.one .two .three .fourwould be valid, but would only select the elements that contain the classfourif it has an ancestor ofthreeand if that has an ancestor oftwoand continues if it is all within the ancestor ofone
Properties to Get Started With
- Color and Background-Color
- The
colorproperty sets an element's text color, whilebackground-colorsets the background color of an element - Both properties can accept one of several kinds of values, here is a link for all legal values
- Common value is a keyword such as an actual color name like
blueortransparent - Also accepts Hex, RGB, and HSL values like
#4f4f4f
- Common value is a keyword such as an actual color name like
- The
p {
  /* hex example: */
  color: #1100ff;
  /* rgb example: */
  color: rgb(100, 0, 127);
  /* hsl example: */
  color: hsl(15, 82%, 56%);
}
Typography Basics and Text-Align
font-familycan be a single value or a comma-separated list of values that determine what fron an element uses- A font name like
"DejaVu Sans"(quotes are used for the whitespace between the words) or a generic font likesans-serif
- A font name like
- Browsers will go through the font list until it finds one that it can display and has access to
- Ex:
font-family: "DejaVu Sans", sans-serif; - The browser will attempt to display
"DejaVu Sans", if not found then it will fallback tosans-serif
- Ex:
font-sizewill change the size and is denoted by a "px" value- Ex:
font-size: 22px
- Ex:
font-weightaffects the boldness of text, can be used with either the word "bold" or a numeric value for how bold it should be- EX:
font-weight: boldorfont-weight: 700 - Numeric values stay between 100 - 900
- EX:
text-alignwill align text horizontally within an element- Ex:
text-align: center
- Ex:
Image Height and Width
- Images and videos can have their display adjusted
- By default, an
<img>element'sheightandwidthvalues will be the same as the source image- In order to keep the same aspect ratio a value of
autois used for theheight, with a numericwidthvalue to match
- In order to keep the same aspect ratio a value of
img {
  height: auto;
  width: 500px;
}
- In this example if we had an image of 500px height and 1000px width, it would be readjusted to a height of 250px
- Both elements should be included even if you are not changing them from the default values.
- If not included the image will take longer to load than the rest of the page contents and it will cause a sudden drastic shift in the page when it readjusts to the image
- By stating
heightandwidth, we can have the page reserve the area for the image with the rest of the page
The Cascade of CSS
- The cascade labels are what dictate how our page looks
- Browsers have default views for buttons and links, etc. and can vary from each browser
Specificity
- A CSS declaration that is more specific will take priority over less specific ones.
- Inline styles, have the highest specificity and therefore priority compared to selectors
- each selector has their own specificity hierarchy as well
- ID Selectors (most specific selector)
- Class Selectors
- Type Selectors(least specific)
- each selector has their own specificity hierarchy as well
- Specificity will only be taken into account when an element has multiple, conflicting declarations targeting it, like a tie-breaker
- When no declaration has a selector with a higher specificity, a larger amount of single selector will beat a smaller amount of that same selector
<!-- index.html -->

<div class="main">
  <div class="list subsection"></div>
</div>
/* rule 1 */
.subsection {
  color: blue;
}

/* rule 2 */
.main .list {
  color: red;
}
- In the example above, both rules are using only class selectors, but rule 2 is more specific because it is using more class selectors, so the
color: red;declaration would take priority - Ex2:
<!-- index.html -->

<div class="main">
  <div class="list" id="subsection"></div>
</div>
/* rule 1 */
#subsection {
  color: blue;
}

/* rule 2 */
.main .list {
  color: red;
}
- In the example above, the div would be blue because the
IDtakes priority
<!-- index.html -->

<div class="main">
  <div class="list">
    <div id="subsection"></div>
  </div>
</div>
/* rule 1 */
.list #subsection {
  background-color: yellow;
  color: blue;
}

/* rule 2 */
.main .list #subsection {
  color: red;
}
- In the example above, rule 2 would take priority because it is more specific
- Because they both contain
#subsection, rule2color: red;takes priority with rule1background-color: yellow;because there is no conflict forbackground-color
- Because they both contain
-
Note: When comparing selectors, you may come across special symbols for the universal selector(
*) as well as combinators (+,~,>, and an empty space). These symbols do not add any specificity to the elements - In the next example, there is a conflict with the
font-size
/* rule 1 */
.class.second-class {
  font-size: 12px;
}

/* rule 2 */
.class .second-class {
  font-size: 24px;
}
- both rule 1 and 2 have the same specificity
/* rule 1 */
.class.second-class {
  font-size: 12px;
}

/* rule 2 */
.class > .second-class {
  font-size: 24px;
}
- Even though this one contains the
>child combinator, it doesn't affect specificity, so there is no change
/* rule 1 */
* {
  color: black;
}

/* rule 2 */
h1 {
  color: orange;
}
- Because
*is a general child selector and no specificity, it loses priority to theh1type selector - In the case of multiple declarations having the same specificity, the last CSS rule declaration is evaluated and applied
Inheritance
- Refers to certain CSS properties that, when applied to an element, are inherited by that element's descendants, even if we don't explicitly write a rule for those descendants
- Typography based properties(
color,font-size,font-family, etc.) are usually inherited, while most other properties are not - The exception to this is when directly targeting an element, it always beats inheritance
- Typography based properties(
<!-- index.html -->

<div id="parent">
  <div class="child"></div>
</div>
/* styles.css */

#parent {
  color: red;
}

.child {
  color: blue;
}
- Even though the
parentelement has higher specificity because of theIDselector, thechildelement would be blue because that declaration directly targets it; while thecolor: redis only inherited from theparent
Rule Order
- The final tie-breaker for conflicts
- The last defined rule will be the one to take priority if there are still conflicting rules after going through the previous steps
/* styles.css */

.alert {
  color: red;
}

.warning {
  color: yellow;
}
- For an element that has both the
alertandwarningclasses, the cascade would run through the other factors and find that there is still a conflict- In this case, the
.warningrule was the last to be declared, so it would be the one to win the tie-breaker
- In this case, the
Adding CSS to HTML
External CSS
- The most common method that involves creating a separate file for the CSS and linking it inside of an HTML's opening and closing
<head>tags with a self-closing<link>element
<!-- index.html -->

<head>
  <link rel="stylesheet" href="styles.css">
</head>
/* styles.css */

div {
  color: white;
  background-color: black;
}

p {
  color: red;
}
- Using the
<link>element inside of the<head>tag, we can then apply therelandhrefattributes- The
hrefattribute links directly to the CSS file location - The
relattribute is required, it specifies the relationship between the HTML file and the linked file
- The
- In the
styles.cssfile, there is both adivandpstylized with curly braces- This is known as a declaration block
- Then any declarations are placed within the block
color: white;andbackground-color: black;are the two declarations
-
Note: Most times the .css file is the same name as the .html file to limit any confusion as to what the file is referring to. Also
styles.cssmay be the only CSS file for the entire website and having a naming convention for it makes it easier to find - The benefits of this method are:
- It keeps out HTML and CSS separated, which results in the HTML file being smaller and making things look cleaner for debugging
- We only need to edit the CSS in one place, which scales well for when you have many pages that are share similar styles within a website
Internal CSS
- Also known as embedded CSS, involves adding the CSS within the HTML file itself
- With this method, you place all of the rules inside a pair of opening and closing
<style>tags- These tags go in the
<head>tags - Because it's directly within the same file, the
<link>tag is not necessary
- These tags go in the
<head>
  <style>
    div {
      color: white;
      background-color: black;
    }

    p {
      color: red;
    }
  </style>
</head>
<body>...</body>
- This can cause the HTML file to get big, but it is useful when you want to add unique styles to a single page of a website
Inline CSS
- This method makes it possible to add styles directly to HTML elements
- Not recommended as you would have to apply these rules to every element if you ever wanted to change multiple
- Terrible at scale
<body>
  <div style="color: white; background-color: black;">...</div>
</body>
- There are no selectors because it's being directly applied to the content
- It is useful though if you want to add a unique style for a single element
Inspecting CSS on a Webpage
- By right clicking a web page, you can then choose to inspect
- Within the styles tab you can live preview changes made to the css of the page to fit your preferences without changing the source code
Assignment
- Go to our CSS exercises repository, read the README, and only do the exercises in the
foundationsdirectory in the order they’re listed, starting with01-css-methodsand ending with06-cascade-fix. - Remember the Recipe page you created as practice from the previous lesson? Well, it’s rather plain looking, isn’t it? Let’s fix that by adding some CSS to it!
- How you actually style it is completely open, but you should use the external CSS method (for this practice and moving forward). You should also try to use several of the properties mentioned in the section above (color, background color, typography properties, etc). Take some time to play around with the various properties to get a feel for what they do. For now, don’t worry at all about making it look good. This is just to practice and get used to writing CSS, not to make something to show off on your resume, so feel free to go a little crazy for now.
- We haven’t covered how to use a custom font for the
font-familyproperty yet, so for now take a look at CSS Fonts for a list of generic font families to use, and CSS Web Safe Fonts for a list of fonts that are web safe. Web safe means that these are fonts that are installed on basically every computer or device (but be sure to still include a generic font family as a fallback).
The Box Model
- Most important skills with CSS are positioning and layout
- It's important to be able to put things on a page exactly where you want them to be
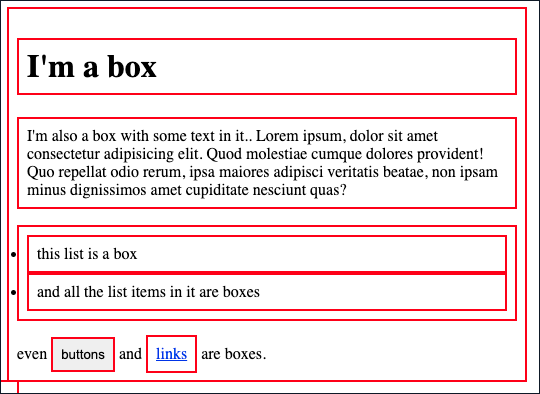
- The box model refers to everything on the web being a rectangular box
- There can be boxes within boxes, but they are all still boxes
- In order to easily see the boxes, you can use a border to view them
* {
  border: 2px solid red;
}
- There are three main ways to position elements within the rectangles
- Each layer can have its own color
.box-one {
  background-color: #EB5757;
  padding: 20px;
  border: 20px solid #9B51E0;
}

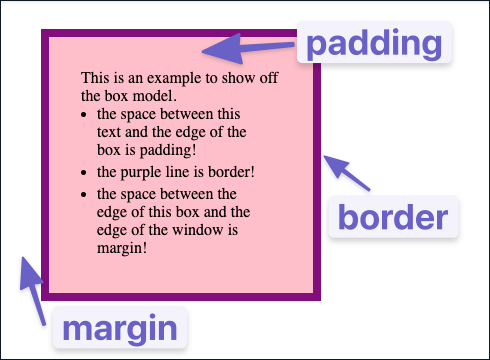
paddingincreases the space between the border of a box and the content of the box.- Most used for buttons to separate the text from the border
marginincreases the space between the borders of a box and the borders of adjacent boxes.- Most used to add spacing between elements
- This collapses between boxes, meaning if two adjacent boxes both have a margin of 60px; the space between them will not be 120px, it will remain 60px
- Uses lengths, percentages, or the keyword auto and can have negative values.
- margin-CSS-Tricks
borderadds space (even if it's only a pixel or two) between the margin and the padding- Most used to emphasize a section of the screen
- Both
marginandpaddingare taken into account when calculating theheightof a box, meaning that even if the height of the element is set to 100px, the posted height will be 100px + the other two attributes- By using
box-sizing: border-box, we can make theheightandwidthparameters be absolute, so thepaddingandmarginwill be within the predefined parameters.
- By using
Knowledge check
- From inside to outside, what is the order of box-model properties?
- padding --> border --> margin
- What does the
box-sizingCSS property do?- It makes the height and width absolute and forces all attributes within the box
- What is the difference between the standard and alternative box model?
- The difference is that the standard box model does not include the
paddingandmargininto the height of the box - The alternative model uses the
box-sizing: border-boxsyntax and forces all attributes within the height of the box
- The difference is that the standard box model does not include the
- Would you use
marginorpaddingto create more space between 2 elements?- You would use
marginas it affects the outside of the box
- You would use
- Would you use
marginorpaddingto create more space between the contents of an element and its border?- You would use
paddingas it creates more space between the text and the border
- You would use
- Would you use
marginorpaddingif you wanted two elements to overlap each other?- You would use
marginsince it's the space between elements and it can also be negative space.
- You would use
Block and Inline
- You can change how a box is calculated by changing the
displayproperty - The default style of block elements is
display: block- they appear on the page stacked atop each other, with each new element starting on a new line
- Inline elements do not start on a new line
- They appear in line with whatever elements they are placed beside
- the
<a>tag is an example of an inline element, it doesn't disrupt the flow of the page, instead it integrates itself into the text - Padding and margin behave differently with inline elements
- avoid using either of these properties for the most part
- Inline block elements behave like inline elements, but with block-style padding and margin
- Can be useful, but nowadays people use flexbox more often
Divs and Spans
- Block-level element, separates parts of the page for organization purposes.